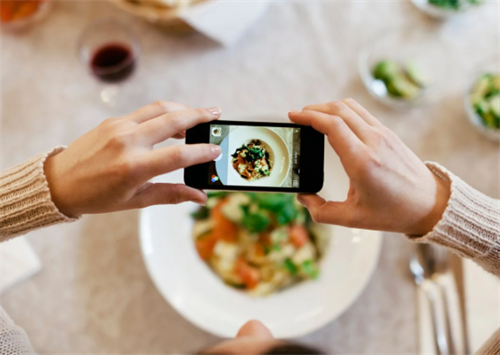
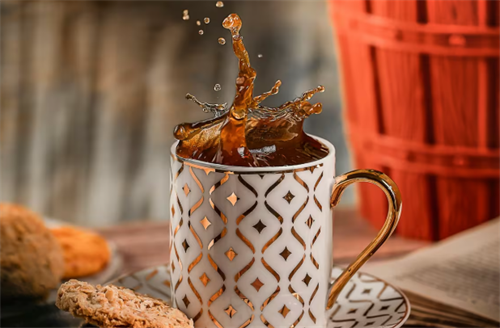
When people go on trips or cook at home, they often like to take pictures of the delicious food. However, the shooting results are often not satisfactory. The pictures don't seem to be particularly appetizing or aesthetically pleasing. In fact, there are some fixed "tricks" in food photography, which are simple and practical. Today, I will simply introduce some techniques for food photography to everyone.
1. The Golden Focal Length: Ditch 1x for 2-3x to Avoid Distortion
The first mistake most beginners make is relying on their phone’s default 1x wide-angle lens. While convenient for group shots or landscapes, this lens often distorts food containers—stretching bowl edges, warping plate shapes, and pulling focus to messy backgrounds (think crumpled napkins or half-empty soda cans) instead of the dish itself. To fix this, switch to 2x or 3x optical zoom (avoid digital zoom, which degrades image quality).
A 2x-3x focal length mimics the perspective of a professional 50mm-85mm lens, compressing the frame to highlight the food’s details without distortion. For example, when shooting a table of hot pot or a spread of sushi, 2x zoom captures the entire spread while cropping out distractions, resulting in a plum), inviting composition that makes viewers almost taste the food.
Pro Tip for Styling: Arrange dishes by height—place shorter plates (e.g., appetizer bowls) in the foreground and taller ones (e.g., soup tureens) in the background. This creates layered depth, preventing the frame from feeling flat and adding a sense of dimensionality to your shot.
2. Composition: The 4 Rules That Guarantee “Wow” Shots
Below are the four most effective composition techniques for mobile food photography, tested and refined through years of professional work.
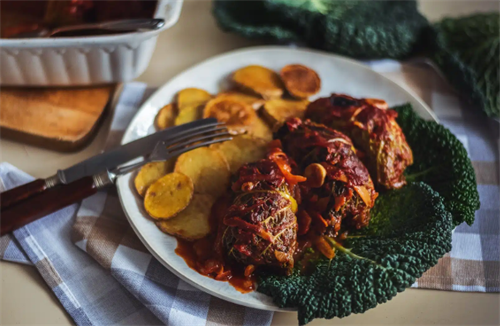
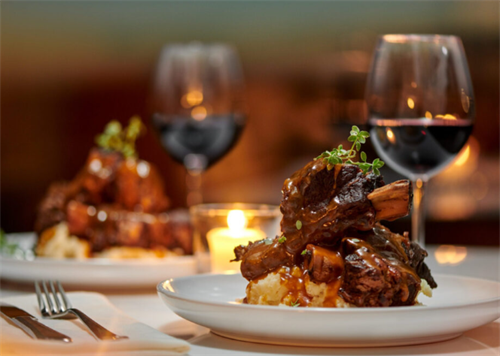
a. Triangle Composition: Stability Meets Visual Interest
Triangle composition is a staple in food photography because it creates a natural, balanced flow that feels intentional without being rigid. To use it:
Select 3 key elements (e.g., a main dish, a side salad, and a glass of wine) and arrange them so their centers form an invisible triangle.
Shoot from a slightly elevated angle (45°) to emphasize the triangle shape.
This technique works for both small plates (e.g., pasta + garlic bread + olive oil) and large spreads—It ensures the frame doesn’t feel cluttered, while each element complements the others. For example, a bowl of ramen, a small plate of gyoza, and a cup of green tea arranged in a triangle will draw the eye from the steaming noodles to the crispy dumplings, then to the refreshing tea—telling a complete “meal story.”
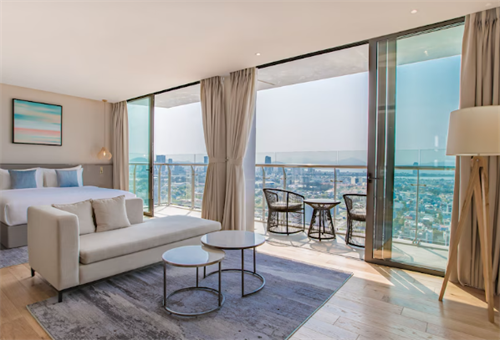
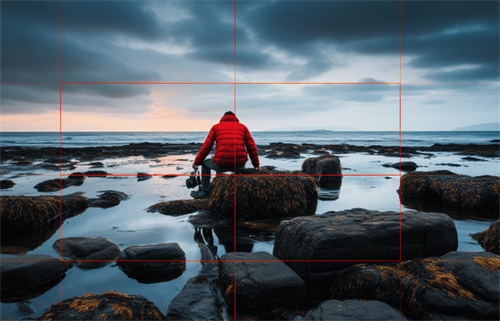
b. Rule of Thirds: Avoid the “Center Trap”
The rule of thirds is a classic photography principle, but it’s often overlooked in mobile food shots. Instead of centering the dish (which can feel static), imagine dividing your screen into a 3x3 grid. Place the dish’s focal point (e.g., the yolk of a poached egg, the cheese pull of a burger) at one of the four intersection points of the grid.
For example, when shooting a bowl of noodles, position the bowl along the bottom third line, leaving negative space in the top two-thirds. This negative space (e.g., a plain tablecloth or a neutral wall) makes the food the clear star, while the off-center placement adds dynamism. The result? A minimalist, high-end look that rivals magazine spreads.
c. Diagonal Composition: Add Energy to Static Dishes
Diagonals inject movement into otherwise still shots, making them feel lively and engaging. This technique is perfect for long, narrow dishes (e.g., a baguette, a plate of sushi rolls) or for capturing interactive moments. To use it:
Rotate your phone 180° (or adjust the dish’s position) so the main element lines up with a diagonal of the frame.
For extra dynamism, add a prop that follows the same diagonal—e.g., a pair of chopsticks picking up a piece of sushi, or a spoon leaning against a bowl of soup.
A diagonal shot of a slice of cake, with the fork placed along the same diagonal, will make the cake look more “reachable”—as if the viewer is about to take a bite.
d. Foreground Blur: Create Depth and Intimacy
Foreground blur adds a sense of depth that makes food feel “close-up” and immersive. To achieve this with your phone:
Shoot from a 45° angle behind a person (e.g., a dining companion) and use their shoulder or arm as the foreground.
Enable portrait mode (or use a third-party app like Camera+ to adjust aperture) to blur the foreground slightly, keeping the main dish in sharp focus.
This technique works wonders for casual, lifestyle shots—A blurred shoulder in the foreground, paired with a clear shot of a bowl of noodles being lifted with chopsticks, adds narrative and makes viewers feel like they’re sitting at the table.
3. Lighting: The “Secret Ingredient” for Appetite-Inducing Shots
a. Side Lighting: Highlight Texture
Warm, soft side light is the gold standard for food photography. It casts gentle shadows that emphasize texture—think the ridges of a croissant, the grain of grilled meat, or the steam rising from a bowl of soup. To create side light:
Position your dish near a window (natural light is best) and place a white reflector (or a piece of white paper) on the opposite side to bounce light back onto the dish, reducing harsh shadows.
If shooting at night, use a desk lamp with a warm (2700K-3000K) bulb, positioned 45° to the side of the dish. Avoid cool white bulbs (5000K+), which can make food look gray and unappetizing.
b. Avoid Direct Overhead Light
Overhead light (e.g., ceiling fixtures) creates unflattering “ raccoon eyes” on food—dark shadows under bowls, harsh lines on plates, and a flat, lifeless appearance. If you can’t avoid overhead light, place a white cloth over the fixture to soften it, or use a portable LED panel to add fill light from the side.
4. Shooting Details: Capture the “Money Shots”
The best food photos don’t just show the dish—they show its soul. Details like a burst of juice from a ripe tomato, the stretch of melted cheese, or the sprinkle of herbs on top make viewers crave the food. Below are two ways to capture these “money shots” with your phone.
a. Close-Up Details: Zoom In on Texture
Use 3x zoom to focus on small, compelling details:
The cross-section of a sandwich, showing layers of meat, cheese, and veggies.
The surface of a crème brûlée, with a cracked sugar top revealing the creamy interior.
The steam rising from a hot bowl of soup (to capture steam, use a fast shutter speed—most phones have a “Sports” mode that works for this).
b. Interactive Shots: Add a Human Touch
Food is meant to be shared, so adding a human element makes your photos more relatable. Try:
A hand holding a taco, ready to take a bite.
A spoon digging into a bowl of ice cream, leaving a trail of cream.
Chopsticks lifting a piece of sushi, with the filling (e.g., avocado, tuna) visible.
These shots create a sense of participation—viewers don’t just see the food; they imagine eating it themselves.
5. Post-Processing: Polish Your Shots (Without Overdoing It)
Post-processing is the final step to turning a good shot into a great one—but the key is to enhance, not distort. Over-editing (e.g., oversaturating colors, over-smoothing textures) can make food look artificial. Below is a step-by-step guide to editing food photos using Xingtu—a popular app available on both iOS and Android—though the principles apply to other apps like VSCO or Lightroom Mobile.
Step 1: Crop for Composition
First, use the “Crop” tool to refine your composition. Adjust the frame to align with the rule of thirds or fix any tilting (e.g., a lopsided plate). This “second composition” step can turn a messy shot into a balanced one.
Step 2: Add Filters (Subtly)
Filters should enhance the food’s natural colors, not change them. For most dishes:
Select the “Warm Food” filter (under the “Food” category) and set its opacity to 40%. This adds a cozy, inviting tone without making the food look orange.
Layer the “Light Food” filter (also under “Food”) at 70% opacity to brighten the shot slightly, making colors pop.
Step 3: Adjust Exposure and Color
Use the “Adjust” tool to fine-tune:
-Brightness: Increase by 5-10% to make the shot feel fresh (avoid overexposing—you don’t want to wash out details).
-Contrast: Increase by 10-15% to enhance texture (e.g., make crispy skin look crunchier).
-Saturation: Increase by 5% for colorful dishes (e.g., salads, sushi) or leave it unchanged for neutral dishes (e.g., pasta, bread).
-Shadows: Lift shadows by 10% to reveal details in dark areas (e.g., the inside of a burger).
Step 4: Local Adjustments (Fix Problem Areas)
If part of the shot is too dark (e.g., a piece of meat in the shade) or too bright (e.g., a white plate), use the “Local Adjust” tool:
Tap the dark area and increase brightness by 15-20%.
Tap the bright area and decrease exposure by 10%.
This ensures every part of the dish looks its best.
Step 5: Add Text (Sparingly)
Text can add context, but it should never overpower the food. For a Japanese-inspired dish, use clean, minimalist fonts (e.g., Japanese or Chinese characters) in a neutral color (black or dark brown) at 70% opacity. Avoid English fonts for Asian dishes—they can feel jarring. For Western dishes, a simple serif font (e.g., Times New Roman) works well.
When presenting the photos we have taken, we should also ensure that the themes and colors of the multiple photos remain consistent, and that they are arranged from various angles to make the content more comprehensive.
Recommend:

Exploring Egypt: Pyramids, Pharaohs and the 3,000-Year Call of the Nile River
Hotel Booking Hacks: How to Avoid Common Pitfalls
Unlock the Power of Composition: A Photographer’s Guide to Creating Visually Stunning Images
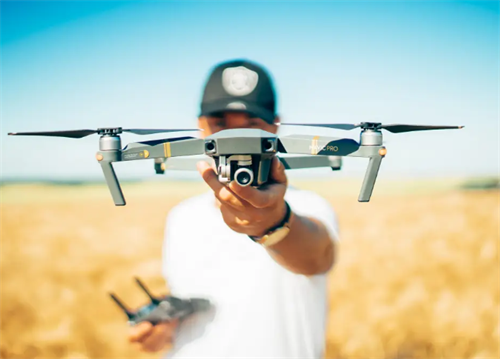
Does a drone fly higher, does the resulting photo quality get better?